A practical step-by-step guide for architects, designers and building owners
When designing a building, you are constantly balancing functionality, budget and regulations. Specifying reliable building products helps prevent issues during construction and in the usage phase.
With this step-by-step guide, you can select and integrate the right roof hatch into your design.
Step 1: Determine the function of the roof hatch
The right choice starts with the function of the roof hatch within your design.
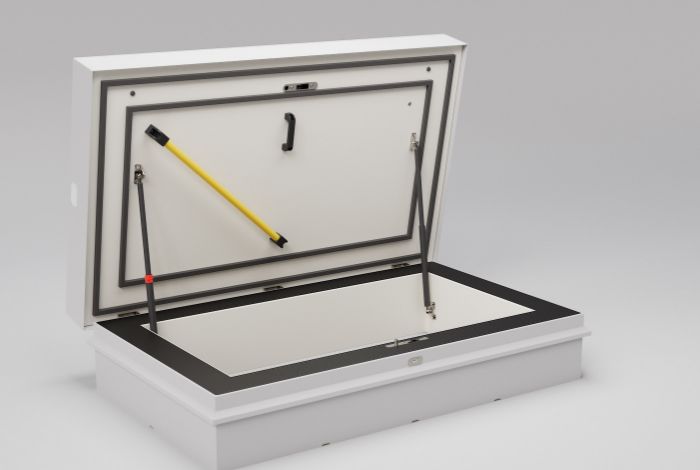
- Standard roof access: For most projects, a standard roof hatch is the right choice, available in various sizes.
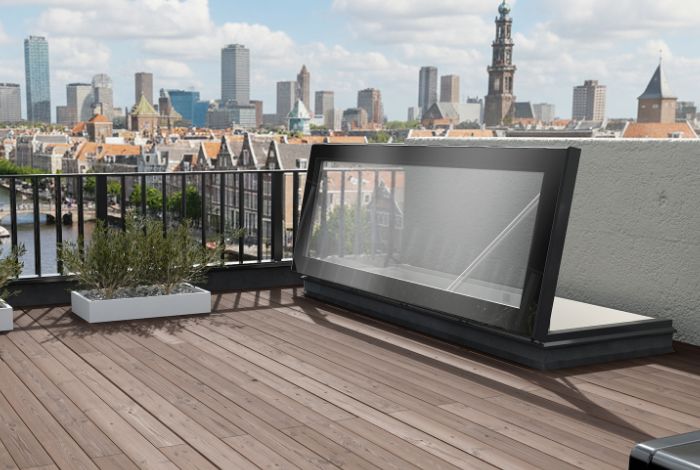
- Roof terrace or daylight: Choose a glass roof hatch for additional daylight and a high-end appearance.
- Fire safety: If fire compartmentation with an EI120 rating is required, choose a certified fire-rated roof hatch.
- Sustainable buildings: For projects with high energy performance requirements (Passivhaus, BREEAM or LEED), an extra insulated roof hatch is the best option.
- Custom or industrial applications: For large openings or specific situations, custom solutions are available.
Step 2: Complete roof access – combine the roof hatch with an access solution
Combine the roof hatch with a ladder, scissor stair or fixed staircase to create a complete and safe roof access solution. The right choice depends on usage frequency, available space and the materials that need to be transported to the roof.
Roof hatch with ladder
For occasional use, a ladder is a suitable solution. The ladder is mounted separately from the roof hatch against the wall, keeping the space below the hatch clear. A ladder is less suitable for transporting large materials or tools.
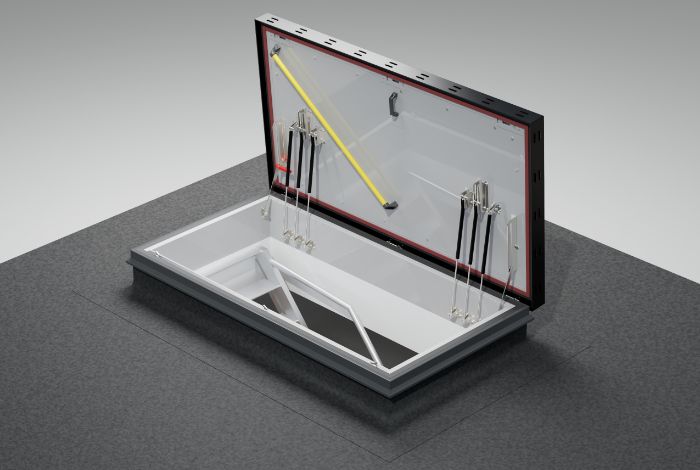
Roof hatch with scissor stair
A roof hatch with scissor stair is suitable for frequent use. The stair folds into the ceiling, ensuring the space below remains accessible. In larger configurations, this solution is also suitable for lift machine rooms and transporting larger materials.
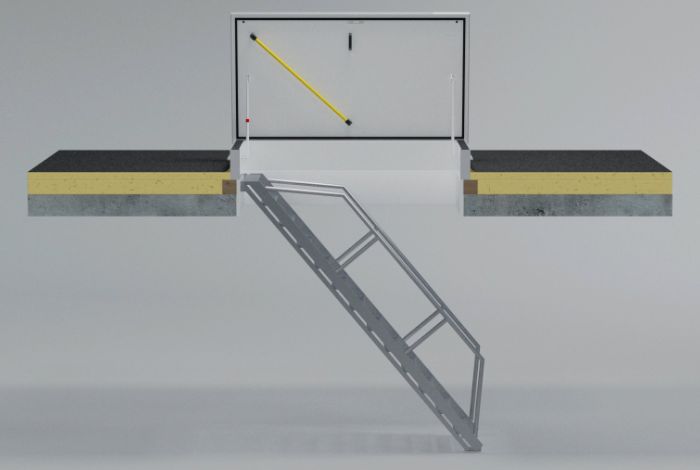
Roof hatch with fixed staircase
For situations where the roof is used regularly and direct access is required, a fixed staircase is the best solution. No additional actions are needed to access the roof, making it ideal for roof terraces.
Would you like to explore all access options?
Step 3: Ensure safety and quality
Certification
To ensure safety, it is important to specify roof hatches that demonstrably comply with the highest standards. TÜV NORD and KOMO® certified combinations provide maximum assurance.
CE (ETA)
Also check whether the roof hatch is supplied with a European Technical Assessment (ETA). This document provides reliable and independent verification of performance and forms the basis for CE marking. By choosing certified products, you minimise long-term risks and ensure a safe and durable solution.
Warranty and quality
A long warranty period is an important indicator of quality. Choose a roof hatch with at least a 10-year warranty and a manufacturer like Gorter that handles engineering and production in-house. This guarantees a high level of quality and continuous innovation.
Step 4: Pay attention to these key roof hatch properties
Thermally broken construction
Prevents thermal bridges, unwanted condensation and energy loss.
Sufficient insulation
Choose a roof hatch with at least 80 mm insulation and always assess the insulation value of the complete roof hatch construction (Uw). The insulation value of the insulation material alone is not a reliable indicator of actual performance.
Secure grip
In addition to a handle, the lid should be equipped with a handrail that preferably connects to the railing of the scissor stair or fixed staircase, ensuring continuous and safe support when accessing the roof.
Opening assistance
A counterbalance system ensures the roof hatch can be opened with minimal effort and with one hand, leaving the other hand free for safe support.
Locking mechanism
The roof hatch should be equipped with an automatic locking mechanism in the open position that can be released with one hand, ensuring safe operation at all times.
Step 5: Optimise your design process with BIM objects
An efficient design process starts with strong digital support. Readily available BIM objects ensure fast, error-free integration into your design and save valuable time.
Step 6: Support for your project
A successful project starts with a solid foundation: clear specifications, reliable products and expert advice when needed.
- Need insight into costs and possibilities? Request a quotation directly.
- Need specification texts? Download them via the link.
- Technical questions or BIM support? Contact our specialists.


